What Is Blending Clip-In Hair Extensions
What Is Blending Clip-In Hair Extensions
Picture this: You’ve just received your gorgeous set of clip-in hair extensions from FH HAIR, and you’re eager to flaunt your newfound length, volume, and style. But there’s one crucial step to master before stepping out with your luxurious locks – blending. Properly blending your clip-in hair extensions with your natural hair is the key to achieving a seamless and stunning look.
In this tutorial, FH HAIR walks you through the art of blending clip-in hair extensions effortlessly, ensuring that your extensions become your hair’s best-kept secret.
Why Blending Matters
The art of blending is all about making your clip-in hair extensions look like they’re naturally a part of your own hair. When done correctly, blending ensures that there are no visible lines or gaps between your natural hair and the extensions. This seamless transition is what creates that enviable, voluminous, and natural look.
What You’ll Need
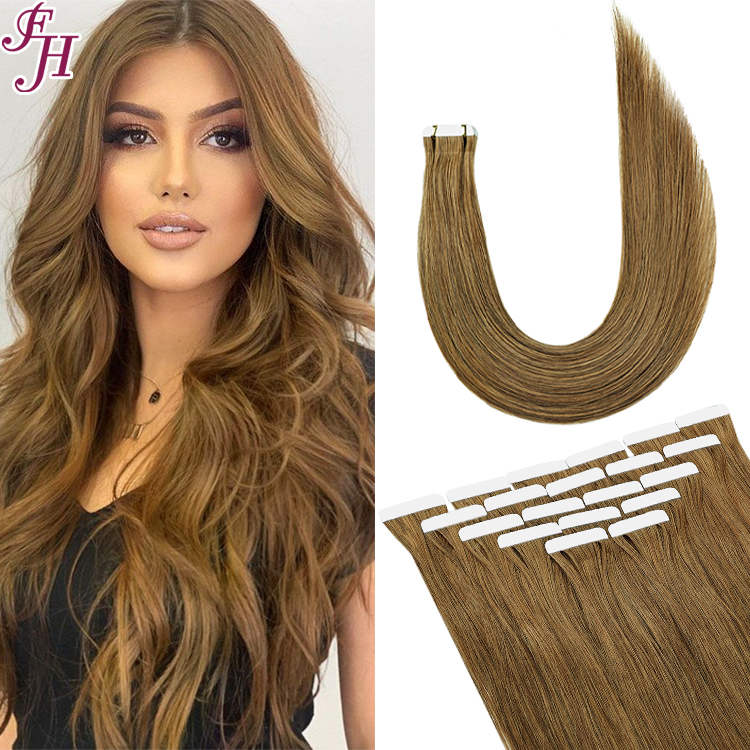
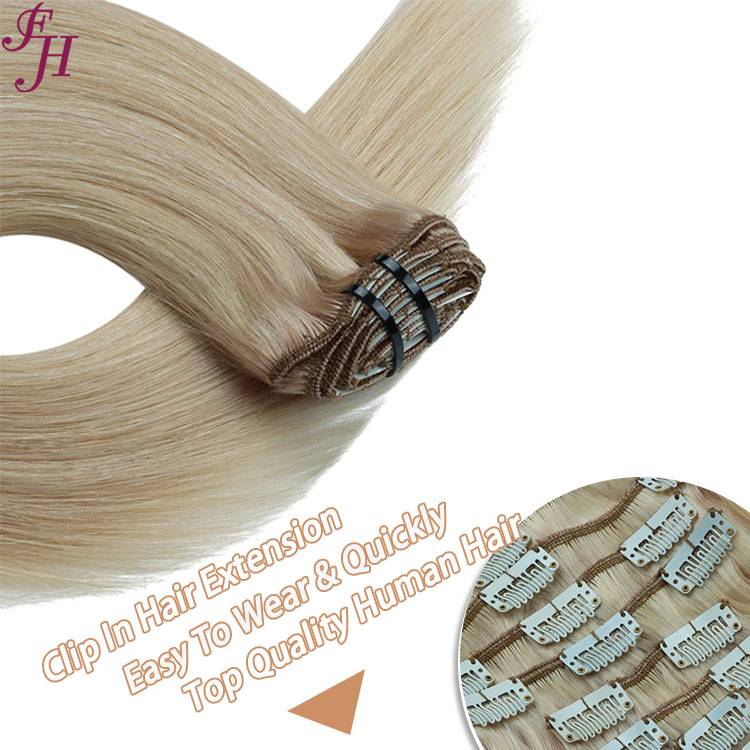
Clip-In Hair Extensions: Choose the right shade and length that matches your natural hair. FH HAIR offers a wide range of high-quality clip-in extensions to suit your style.
Hairbrush or Comb: A good-quality brush or comb is essential for detangling and smoothing your hair.
Clips or Hair Ties: These help section your hair for a more organized blending process.
Hair Styling Products: Optional products like hairspray, heat protectant, and styling serum can enhance the blending process.
Hair Straightener or Curling Iron: Depending on your desired look, you may need a styling tool to achieve consistent texture.
Step-by-Step Tutorial: Blending Clip-In Hair Extensions

Follow these simple steps to blend your clip-in hair extensions seamlessly with your natural hair.
Step 1: Prepare Your Natural Hair
Start with clean, dry, and styled natural hair. Ensure that it’s smooth and free from tangles.
Step 2: Section Your Hair
Use clips or hair ties to divide your hair into sections. This will make it easier to work with both your natural hair and the clip-in extensions.
Step 3: Open the Clips
Carefully open the clips on your clip-in hair extensions. You should have a set of wefts with different widths.
Step 4: Start from the Bottom
Begin with the widest weft and attach it to the lower section of your hair. Ensure that the weft is close to your scalp but not too tight.
Step 5: Snap and Blend
Snap the clips closed to secure the weft. Gently tug on your hair to ensure it’s securely in place.
Step 6: Layer Gradually
Continue adding the remaining wefts, working your way up the back of your head. Gradually layer the wefts for a natural progression from shorter to longer.
Step 7: Check for Gaps
Once all wefts are in place, check for any gaps or uneven blending. If needed, use a mirror and a hand-held mirror to view the back of your head.
Step 8: Style as Desired
Style your blended hair as desired, whether it’s straight, wavy, or curly. You can use a hair straightener or curling iron to match the texture of your extensions.
Step 9: Final Touches
To ensure that your extensions blend seamlessly, you can lightly tease your hair at the roots to add extra volume and hide the clips. Use hairspray to set your style in place.
Step 10: Confidence Boost
Once you’re satisfied with your beautifully blended clip-in extensions, embrace your newfound confidence and enjoy your stunning, voluminous hair!
Conclusion
Blending clip-in hair extensions with your natural hair is a skill that can be easily mastered with practice. The key is to take your time, work in sections, and pay attention to detail. With FH HAIR’s high-quality clip-in extensions and this step-by-step tutorial, you can achieve a flawless, natural look that turns heads wherever you go.
Elevate your hair game with FH HAIR’s premium clip-in extensions and master the art of blending for a hair transformation that’s both stunning and seamless.