Hair Extensions
If you want to add length, volume, or both to your hair, you might want to consider a hair extension. They can enhance your current hairstyle, make up for bad haircuts, or even prepare you for a special occasion. Care for hair extensions is not an easy task, and improper installation can do more harm than good. To avoid these risks, you should consider having your extensions installed by a professional. Listed below are some tips to help you care for your extensions properly.
Glue
If you’re a newbie to applying hair extensions, you may want to consider getting a professional to apply the glue. While it may seem like an easy process, applying hair extensions requires time and skill. Wash your hair thoroughly and brush it to remove tangles. After the hair extension glue is applied, you’ll have to wait several weeks before your natural hair grows out. Glue for hair extensions can stay in place for up to four weeks.
Glue for hair extensions can be purchased online from marketplaces such as Amazon or Aliexpress. You should carefully consider the product description and the feedbacks of previous consumers to find a quality product. You can also purchase glue for hair extensions from the official websites of hair factories. These factories will offer a wider selection and lower prices than a single manufacturer. The K-Hair website is the most reputable address in Asia, and their customer service representatives are available seven days a week to answer your questions.
This hair adhesive has a very high holding power. It dries quickly, but it remains on the scalp for a long time. If you do not regularly wash your hair, your extensions will remain on your scalp for a long time. Fortunately, the glue itself is water-resistant and easy to remove. If you’re worried about a reaction to the glue, consider purchasing a test jar so you can make sure you’re comfortable with the product before applying it to your hair.
Tape
There are several tips that you can follow when using tape for hair extensions. First, make sure that your hair is dry before applying the extensions. You should wash your hair the evening before the installation. Remember that damp hair is more slippery than dry hair, so they will likely slip off easily. Next, divide your hair into manageable sections. Lift a small section, then place the hair piece underneath it. Then, apply new tape over the hair piece. Finally, use pliers to hold the pieces in place. When you’re finished, wait 48 hours before washing and styling your hair again.
Applying tape-in extensions too close to the scalp will result in a difficult removal and will damage your natural hair. Make sure to apply them farther away from the hairline, which will minimize the risk of getting tangled with your own hair. The tape-ins should also be evenly placed on your head. Taping them diagonally can cause the extension to slide off and feel uncomfortable. To avoid this problem, you can apply them in a brickwork pattern.
Another important factor that should be considered when applying tape extensions is the thickness. A hair extension that is too thick or too thin will not stick properly to your hair. To avoid this, make sure that the hair between the tape is slightly smaller than the hair between the two pieces. This way, you won’t have to worry about stray hairs hanging in the tab. Also, make sure that the thickness of the hair in between the tape and the extension is similar to that of your hair. If you have a thicker head of hair, you can use thinner sections of tape.
Halo
If you’re looking to add volume and length to your hair, a Halo hair extension is a great choice. The custom-made extensions are designed to blend with your natural tresses and don’t require any physical attachment. And since they are invisible, you won’t even notice they’re there! Not only will they give you more hair, they will also match your own perfectly! And, because they are custom-made, you can get a different style every time you want one.
Using a rattooth comb, gently pull the hair on the halo outwards and away from the weft. You can also use a rattail comb to pull out hair on the bottom side of the halo, but be careful not to pull out too much. Once you’ve gotten the halo on your head, you can use a rattail comb to brush the extension to make it as natural as possible.
You can dye the halo hair extensions at home to match your hair color. Because halo extensions are made from real, 100% human hair, you can even dye them yourself at home! But make sure to dye a small strand first to be sure you get the desired shade. You may also want to wash the halo before dyeing it so the dye will take better. Lightening or bleaching the extensions is also not recommended.
Micro links
Since micro links are not rooted in your hair, you can safely wash them at home. However, you should remember that regular washing is necessary to ensure that your micro links last as long as possible. To avoid unnecessary breakage, use a special method when washing your micro links. Ideally, you should wash them every two weeks. You should also brush out the loose hair and re-tighten the extensions at these maintenance sessions.
The benefits of using micro links are numerous. Micro links are flexible and blend in seamlessly with your natural hair, which means you can use hot tools and a wide range of styling tools. There are a few things to keep in mind when choosing micro links for hair extension. First and foremost, micro links should not restrict your natural hair’s movement. Second, they shouldn’t pull the strands when wet. If your hair is too thick or too thin, you should look for an alternative method.
The lifespan of micro links is three months. Since they tend to tangle easily, you should try to shampoo your hair in a way that will protect your micro links. This may result in damage to your own hair, so you should be gentle when shampooing. Third, you should schedule maintenance appointments with your stylist every two to three weeks. Your hair will grow back between appointments, so it’s best to come in regularly. If you’re thinking of getting micro links, consider the pros and cons of micro link extensions before choosing your next stylist.
Tension straps
Many hair extension techniques are similar, but the Glamour Locks Hair Extension System is unique. The technique uses a Tension Strap, a thin piece of material attached to the client’s hair, thread, or beads to create a track that the extension hair will be placed on. The Tension Strap acts as a support mechanism, holding the weight of the extension hair in place. This is a relatively painless process for the stylist, as it can be completed on a client’s head in a single day.
Each loop is connected to a plurality of connecting straps 50. These straps are made of two longitudinal ends, one connected to the central end 66 and the other to a portion of the outer adjustment band 60. Each loop is secured with a thread 62 that passes through the plurality of apertures 14. The length of each loop is substantially consistent, and the straps are removable if needed. The straps are also made of durable, elastic material to minimize damage to the hair.
Tension straps for hair extension holders are often threadable, which means they may expose the artificial devices attached to the hair. In such a case, it may be preferable to use a single continuous holder. The inner cavity 10 should match the length of the weft 30 that the wearer wants to use. The outer adjustment band 60 is typically made of fabric, rubber, or thin plastic. The holder is then attached to the braid with the help of threads 36.
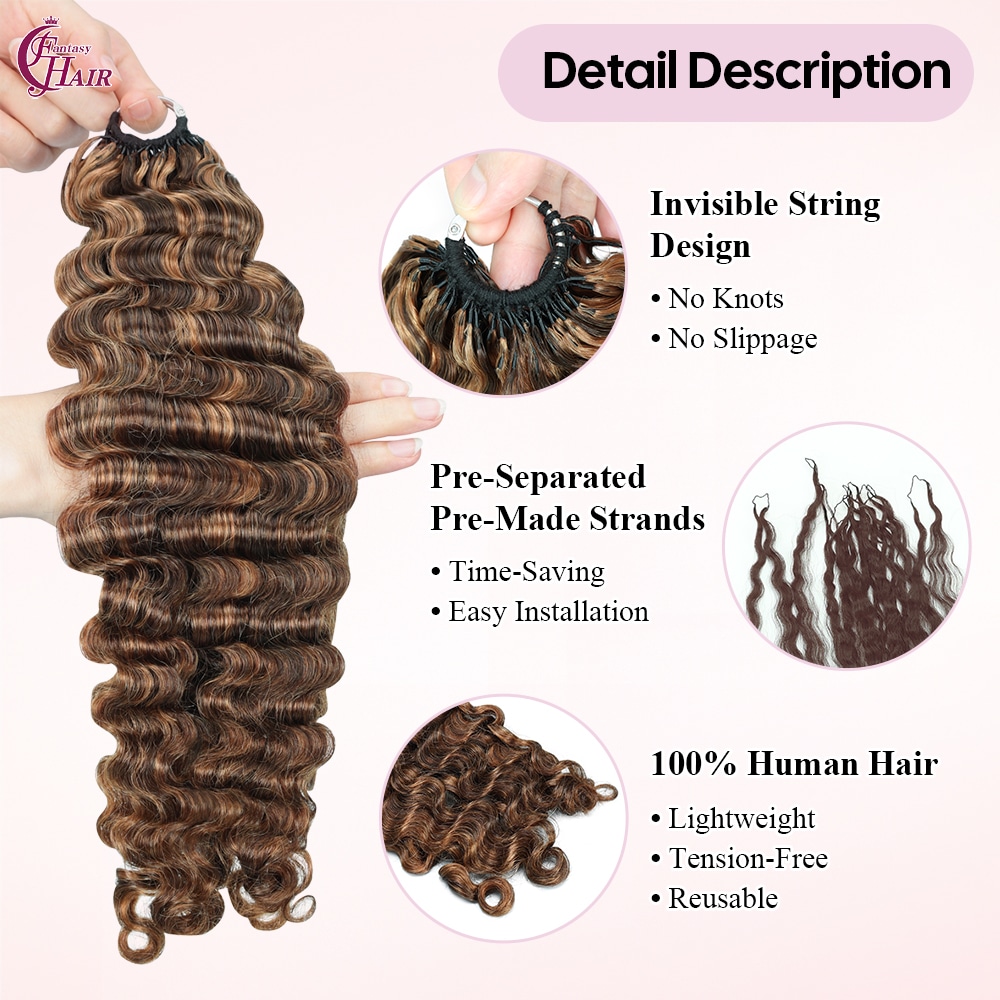
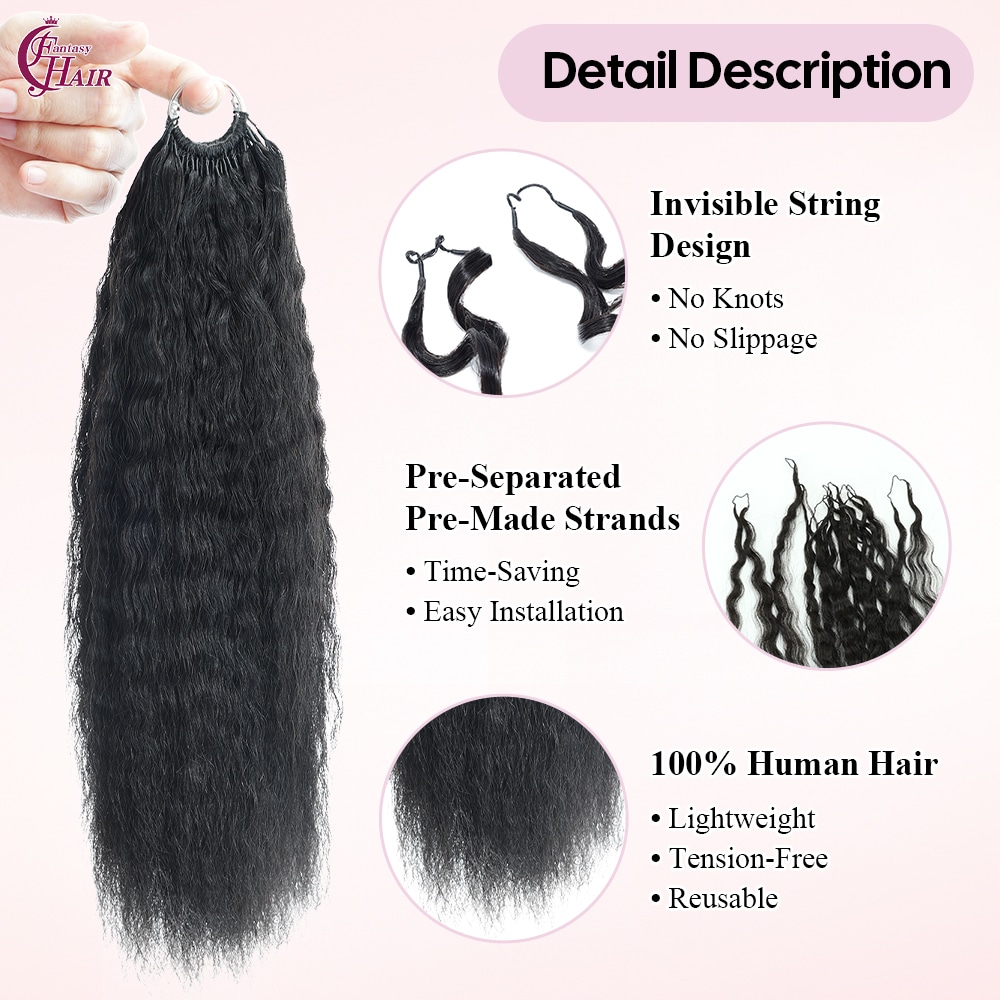
I-tips
Before deciding to try a hair extension with I-tips, you should discuss your preferences with a stylist who specializes in this technique. I-tips are a popular choice because they’re easy to install, lightweight, and don’t pull on natural hair. They also don’t require braiding, so you can access the scalp and style your extensions easily. Whether you choose a natural look or a modern one, i-tips will make a huge difference.
I-tip hair extensions require no glue, heat, or chemicals. The installation process is easy to follow if you understand the basic principles of the technique. You just need pliers to apply the I-tips to your hair. Afterwards, you can curl or straighten the hair. However, it’s important to remember that hot styling tools can cause damage to natural hair. If you’re unsure of your skills or are a beginner, you’ll need to watch some DIY videos online. You’ll need to buy basic tools and follow a few tips for installation.
Another advantage of I-tips is that they’re healthier for your hair. When you opt for I-tips, a micro-link is settled onto the hair strand. The extension is then inserted into the micro-link. Once secured, the micro-link is closed using special pliers. This method uses no glue and is safe for your natural hair. The only difference between I-tips and other hair extensions is that they’re more natural.